September 30, 2012

Guest Post: Amity's Delightful Dining Room

As I noted in my first guest blog post (the one about collections), I bought my cottage almost three years ago and had amassed a somewhat random assortment of furniture and knick knacks over the previous several years. I have a fairly small dining space that is just to the left of my front entrance and basically part of the overall living area, so I had to create a space that is inviting and, of course, adorable. 
 
My first order of business was to paint the dining room table I inherited from my parents. At the time, I had been seeing a lot of metallic side tables and dressers at local furniture stores. I very much wanted a snazzy piece of furniture like that but didn't want to pay the unnecessarily high price for it… so, Lowe's to the rescue.
I don't have before and after pictures but just trust me when I say the table was the epitome of 1980s dining sets. It had been stained a dark brown and had chairs that seem to be in every Goodwill across the country -- you know, the ones with the high, open backs and country-floral scroll work at the top. The project involved three steps, and I started by priming the table with Glidden Gripper primer/sealer. I'm usually partial to paint + primer in one, but, for this particular project, I had to use primer alone. Once the table was primed, the second step was putting the base color on the table. I applied two coats of Valspar's Brilliant Metals Shimmering Bronze. I would definitely recommend at least two coats. The third step involved a top coat that actually brings out the shimmer of the Shimmering Bronze. It's a sister-paint to the Shimmering Bronze, and the good folks at Lowe's won't let you buy one without the other. The paint experts at Lowe's will also give you really good tips on how to use this paint. It's not the easiest, simply because it involves a special rolling brush and careful application. However, I'm somewhat careless when it comes to painting, so if I can do it, anyone can.
The finished product is exactly what I wanted -- a high gloss, high shimmer, pale bronze dining room table. It adds just a little bit of fancy to a cottage dining room. And, I topped it off with a few glass vases/bottles from TJ Maxx that act as a year-round centerpiece.
The next part of my dining room transformation was to find new chairs. I loathed those 1980s, country-floral chairs. They made me feel like I needed a bunch of rooster figurines siting on shelves. For readers in Tallahassee, my answer was Bobbi at Southern Chicks on South Monroe. If you have yet to stop by her place, it's a must-do for anyone who loves good finds at even greater prices. Bobbi searches for furniture on the cheap and then refinishes, re-assembles or re-designs, so I called her to see if she'd take my rooster chairs in exchange for something else she had on hand. Thankfully, she agreed to the trade as long as I paid her to refinish whatever chairs I wanted. I ended up paying $120 for four refinished, black, open-back chairs. That's a steal in my book, considering even TJ Maxx sells chairs for $139 a pop. The best part is that the chairs have a cushion seat that can be recovered whenever I feel the need for a new look. At this moment, they are covered with a canvas French-scroll fabric that I snagged on sale at Tallahassee Decorative Fabrics. 
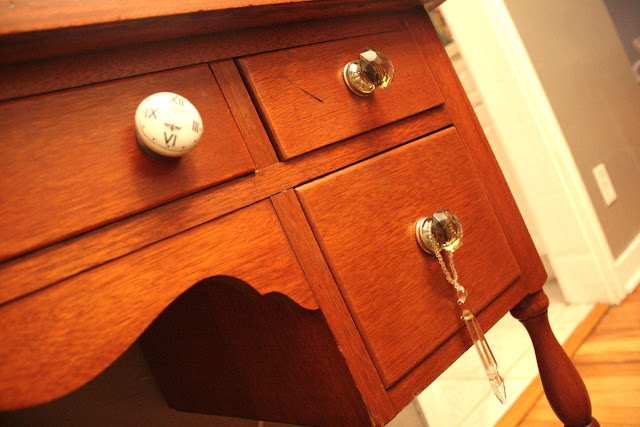
Of course, no dining space is complete without a bar. I had every intention of picking up a piece at Southern Chicks, but a friend of mine was getting rid of a bedroom dresser and he gave it to me for free. I decided to leave the stain as is and went to Hobby Lobby to buy knobs that matched the fabric on my chairs. The dresser is actually missing its mirror, but I left the mirror-holders to act as a frame of sorts for a couple of framed bird prints I bought in San Diego. I also hit up one of my favorite stores, Home Goods, for a coordinating lamp and used the desk space to display my Venetian champagne glasses, a cocktail book, a bottle of wine and other assorted bar materials. The final touch of the bar area was the old mailbox from my front porch. The very first week I moved in, the mailman instructed me to buy a roadside mailbox because he was no longer going to deliver mail to my front porch. Total bummer, but I ended up with antique wall decor, so I can't complain too much.
To finish off the room, I hit up Urban Thread (basically, an outlet store of Anthropologie and Urban Outfitters goodies) for white ruffle curtains. TIP: If you ever decide to buy curtains from an outlet store, be sure to bring a measuring tape with you. A lot of times they are at an outlet store because they have mismatched lengths. I bought the curtain rods from… wait for it… Wal Mart. It's not often you find cute decor at Wal Mart, but I never discount it when I'm looking for hardware. 

My dining room tends to be where most of my guests gather -- whether it's for a weekday dinner party or Friday night drinking games -- so it was important for me to have a functional and inviting space.  I have a feeling that my dining room table will follow me wherever I end up next and will continue to be a focal point for a dining room or breakfast nook. The real beauty of my dining room is that it's interchangeable, from my chair cushions to the dresser knobs to the curtains, and changing any of those won't ever break the bank. 
 
I so love Amity's fresh take on some old pieces in her dining room. What do you guys think? I hope you all have a wonderful week!

September 26, 2012

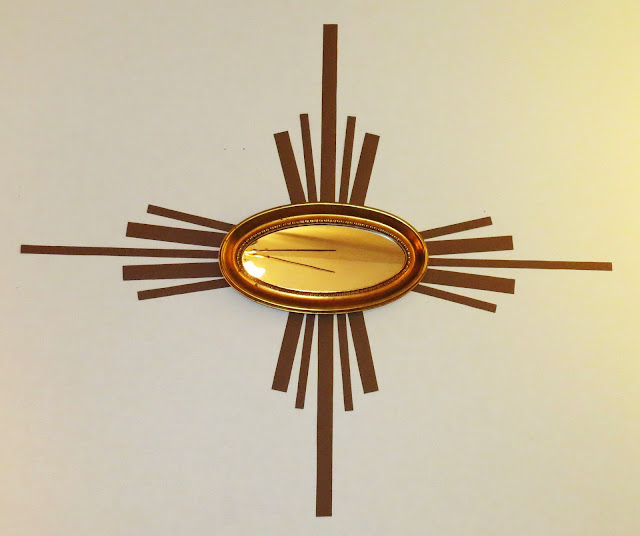
Reveal: DIY Sunburst Mirror

If you read Tuesday's post, then you can probably guess what's coming next, and if not, the title should give you a hint. Since posting the image with a painted sunburst mirror, I couldn't get my mind off making my own!
Originally I had lofty thoughts of painting the sunbursts directly on the wall in a delicate pattern, but after thinking that one through and realizing that it might take more than one coat of white paint to cover it up when I move out of my rental this December, and with my luck the whites wouldn't match and I would have to repaint the entire room on top of packing all my stuff up. So yea, the paint was a no go.
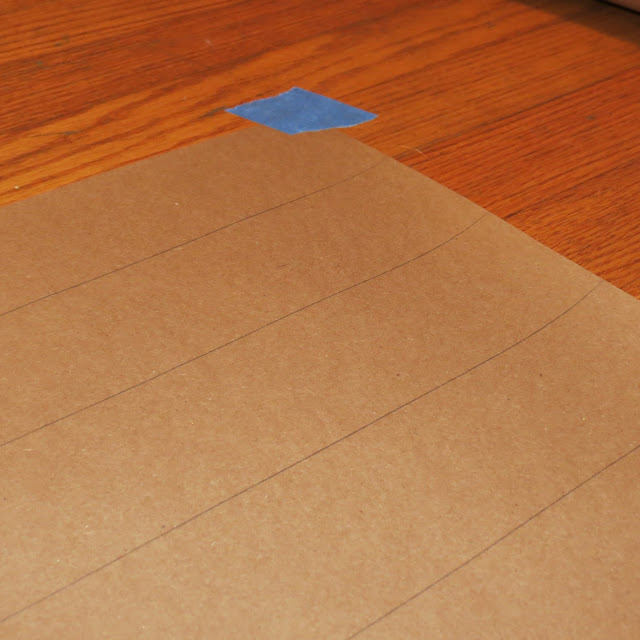
Then I decided to pull out my ever useful roll of contractor's paper from Home Depot and cut small strips in two lengths and widths for a fun sunburst pattern. I just played around with a few different sizes until I landed on something I liked enough to tape onto the wall. Yes, you read that right, tape. For this project, I just used scotch tape, paper I already owned, and a yard sale mirror I picked up earlier in the year for $2. Nothing beats a $2 project! Well, I guess a $0 project would win out, but $2 is still pretty dang exciting.
What do you guys think? I totally love the way it turned out and kind of want to make one for over my bed in lieu of the headboard project I've had on my to do list for years now.

Hope you guys have a great weekend and make sure to stop in next week when I get back on track with my guest posts. Monday I will be featuring Amity's second guest post and then the schedule will get back to normal with Tyler's third post coming a week from today. Don't forget to follow me on twitter @trimandtailored and on facebook @Trimmed&Tailored.

September 24, 2012

Tuesday Ten: Lighting

Elegant lighting is always something I admire in a home. I think it speaks volumes to the homeowner's style, and taking the time to personalize and upgrade builder basics is easy and makes a huge impact. Whether your budget is large or small, there are a plethora of options out there to warm up your rooms.

Below are ten looks I'm loving.
Image from tassels.tumblr.com
A crystal chandelier is a classic symbol of beauty and I have always dreamed of having one in my entry. For now, I'll keep dreaming.
Photo from hdinspirations.com
How adorable is this lighting made out of glass decanters? So perfect for a bar area but also unexpected when used in another area such as a hallway.
Photo from ByrantParkDesigns.com
Photo from Lolalina.com
Bold and interesting floor lamps are a great way to make a statement and add some interest to a room. I love this one, but affordable options can be found a thrift stores and simply spray painted. IKEA also has a lot of great floor options. Bold table lamps are another way to make a statement. I have tons of these throughout my house that I have found at thrift stores for under $10 and painted.
original source unknown
Side note: how adorable/awesome of an idea is this faux sunburst mirror? What an incredible idea to just paint the design on the wall using a small mirror as the center. Totally affordable and easy. Look out for a post on this in the future. And if any of you do it too, send me the end result and I'll show it on the blog.
String lighting adds a romantic feel to an outdoor area, and adds a nice touch for events. I think it's always fun to add these indoors as well, even outside of the holiday months. There are so many variations of string lights to choose from, but sticking to the basics will give you the best bang for your buck. Think of stores like Target and Walmart or even old holiday lights from a yard sale, just make sure you test them out to ensure they work before you hand over the cash.
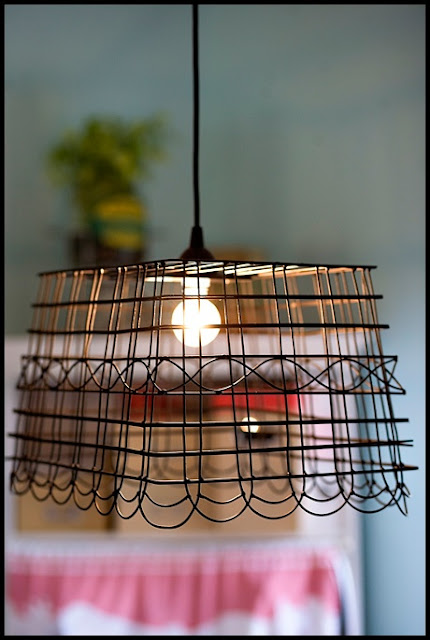
Basket lights are always eye catching, and this one can easily be a DIY project using a simple string light kit and an old wire basket. I love the look of this for a little boys room or over a rustic breakfast table.
Photo and DIY tutorial from ashleyannphotography.com
This magnifying glass lamp really caught my eye while shopping this past weekend. It is a really fun conversation piece, and I love when art is functional. It also comes in a floor version, which I'm kind of obsessed with, but clearly it's way out of my price range.
Anthropologie.com
Please remember to like me on facebook @Trimmed&Tailored and follow me on Twitter @trimandtailored. Happy Tuesday, everyone!

Guest Post: White Hot Obsession Confession

Today, I'm excited to share with you guys Ashlie's second guest post. Enjoy! And happy Fall everyone!

I have a confession to make...I LOVE white furniture. Not just plain white, but the "distressed, romantic, rustic white." Life is messy and blemished; I feel that my overall style in most things, including home decor, reflects this. That being said, I decided to tackle a project that has been sitting in my garage for months, untouched. My aunt and uncle were getting rid of a hand-made solid oak desk and I willingly accepted it. My uncle used to own a cabinet door business and sometimes utilized his shop for side projects. This desk was one of them.
I knew immediately that I wanted to paint the desk white and distress it for that romantic, rustic look. The tools used for this project included: 100 and 150 Grit Sand Paper, Small Hand Sander, White Primer Spray Paint and Satin Finish White Spray Paint. Something to consider if doing a distressed piece of furniture is the type of paint to use. If you are going to sand it down or nick it up a good bit, then spray paint is a cheaper alternative and looks just as good!


When refinishing anything wood, you really should take the time to at least lightly sand down the surface. It will make a huge difference for your finished project.
I really do have to give credit to my Handsome Hubby on this project! He actually helped a good bit and informed me of the correct "techniques" when sanding or spray painting. Do several light coats of paint vs. thick coats as they dry more quickly and it's easier to add than remove. This was also my first time using a hand sander so it was a learning process.

Here are a few other pieces in our home with the same type of "rustic white" effect.


Repainting, re-finishing, staining or distressing are all very cost-effective ways to update things you currently have in your home. You can always start out with a small item like a picture frame to test the waters. Happy home goods recycling!

I just love this new desk Ashlie and her hubby did, what do you guys think? White washing really can be such a great and inexpensive way to update an old piece. Have a great day everyone!

September 18, 2012

Tuesday Ten: Orange

Orange is one of my favorite colors to decorate with, especially in the fall. It is, afterall, the color associated with my birthday. I'm in the middle of an orange project of my own and am hoping to have that completed to share on the blog in a couple weeks. But until then, I wanted to share some of my favorite spaces that use orange either as an accent or a feature. Enjoy!
Photo from Atlanta Homes. Interior Designer Brian Patrick Flynn
Photo courtesy of Decor Pad (decorpad.com)
By framing out the bold orange walls in black, the color really pops without becoming overbearing. The art in black frames also help to define the space. When these bold accents are paired with the crisp white of the wainscoting, it results in a beautifully custom designed room. I absolutely love this.
Photo from Pure Home (purehome.com)
Photo from Relish Small Pleasures (relishsmallpleasures.blogspot.com)
If you're not brave enough to paint an entire wall this bold hue, start slow with a lower level of commitment and simply paint the backs of a bookshelf. Or if that's still too much for you, grab some items off your shelves and add a fresh coat of orange spray paint and group them in odd numbers on your shelves for a more eye catching look.
Original source unknown, found on mrshowardpersonalshopper.com
Photo from The Inspired Room (theinspiredroom.net)
Original source unknown, found on Sweetie Pie Style (sweetiepiepumpkinnoodle.com)
Photo from creativeorganizing.typepad.com
Original source unknown, found on delightbydesign.blogspot.com
Think outside the box when it comes to adding color to your home. Adding a fun color to the floor or ceiling brings in an unexpected pop, really creating a statement. Just remember to have fun when bringing color into your home, because in the end, the colors you add should make you smile.

Have a great day everyone. Please head over to @Trimmed & Tailored on facebook and "Like" my page, also follow me on twitter @trimandtailored if you don't already.