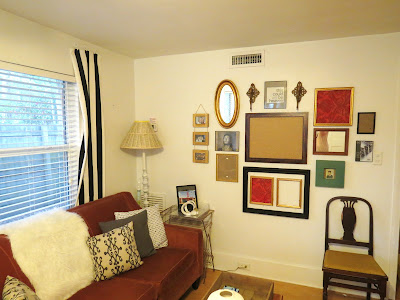
I love gallery walls. I always have and I always will. Especially when they're filled with fun pieces that offer a variety of texture and color and are specific to the home in which they live. Those were my criteria when creating this small gallery wall in our living room, and I'm pleased with how it turned out.
I incorporated old and new frames in varying colors and finishes as well as mirrors and sconces and began layering them in. I played around with a few layouts on the floor before putting any holes into the wall and decided on a general oval shape for the gallery.
Once I had my layout perfect on the floor, I started placing items on the wall from the center out to ensure an even arrangement. (I could have sworn I documented this step, but the pictures are nowhere to be found, sorry!) I'm not someone who measures things out, but I seem to have a pretty good eye for spacing. If you're not good at eyeing it, then you'll want to measure your frames and pre-mark where your nails or screws should go or else you'll end up spending far more time than necessary and tearing up your wall.
Here's a sneak peek of how our living room is shaping up. Don't mind those crazy-hanging curtains, I'm trying to decide if I can work with fabric I already have or if I need to make a trip to the fabric store. All of the pieces I used in the gallery wall were things I had lying around my house, mostly thrift store finds throughout the years. That chair is also a thrift store goodie I scored in North Carolina for $5, and it folds up.
I plan on changing of few of the colors of the frames with paint, replacing most of the pictures with photos of John and me -- except for the high school picture of my dad in the bottom right green frame; it's one of my all-time favorites. In addition to the changes on the wall, I need to decide on curtains and possibly recover and paint the chair. Stay tuned next week and I'll share with you guys the finishing touches.


Handsome!😊
ReplyDelete