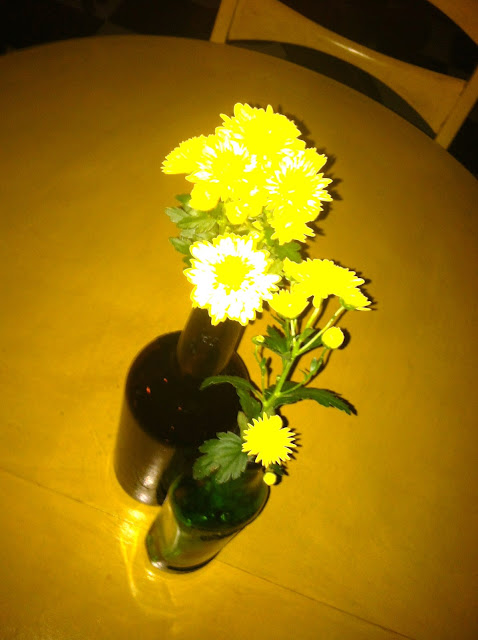
I started out by soaking the
bottles in really hot, soapy water and used an SOS Pad to scrub the
labels and adhesive from the glass. Once that is complete, it's time to
utilize your inexpensive new house accessory.
MATERIALS
MATERIALS
OWNED - White String Lights, Bottles, Teflon Tape -1/2"
PURCHASED - Lowes & Home Depot - Yellow Mums, 1/2''-3/8" copper coupling,1/2" copper cap, replacement tiki torch wicks, torch fuel
GIFTED - Single blooms, wine carafe, moss green decorative sticks, Pumpkin
Here I simply
cut a few stems from the mum plant and placed them in dark green and
brown bottles. The colors really pop and this can be used as a centerpiece
or just to brighten up a room. The beauty of this is that you really
can't mess it up! Just add or take away and customize to the area you
have to work with.
This time I used some white Christmas lights inside of a clear wine carafe and used the remaining lights to wrap around the mums and the table legs. I also used things around the house to put together some autumnal outdoor decor.
This time I used some white Christmas lights inside of a clear wine carafe and used the remaining lights to wrap around the mums and the table legs. I also used things around the house to put together some autumnal outdoor decor.
Now for the in depth portion of this project...Wine Bottle Lanterns.
I do need to give some major kudos to my Hubby yet again, as he did the mounting and necessary adjustments to make it all come together. I first heard about this project from a friend of mine and had been wanting to try it ever since. The materials are fairly inexpensive and were all purchased from Lowes and Home Depot; materials for the lantern and the mount were probably around $25 for everything. This is of course after 3 total trips to different stores and purchasing incorrect materials. However, if you have done any type of home project, then you know that is all part of the finished project! Due to the fact that this was a project that Lee actually had to complete for me, I am including some helpful "How To" sites that may provide you with a more directive approach. It includes a list of materials as well.
I do need to give some major kudos to my Hubby yet again, as he did the mounting and necessary adjustments to make it all come together. I first heard about this project from a friend of mine and had been wanting to try it ever since. The materials are fairly inexpensive and were all purchased from Lowes and Home Depot; materials for the lantern and the mount were probably around $25 for everything. This is of course after 3 total trips to different stores and purchasing incorrect materials. However, if you have done any type of home project, then you know that is all part of the finished project! Due to the fact that this was a project that Lee actually had to complete for me, I am including some helpful "How To" sites that may provide you with a more directive approach. It includes a list of materials as well.
First, wrap the larger end of the coupling with Teflon tape until it is securely nestled in the mouth of the bottle. Next,
place the wick inside of the coupling so that it extends about 1/2 "
above the end. Pour the fuel into the bottle, ensuring that you fill it
up enough to meet of the end of the wick. (You may find longer ones
online vs. your local home improvement store.) Finally, insert the wick in the mouth of the bottle and tighten the hex bolt for a snug fit. The 1/2" copper cap is placed on top of your wick to keep it dry while not in use.
Mounting Instructions - http://www.gerardotandco.


 \
\


No comments:
Post a Comment